Friday, June 27, 2008

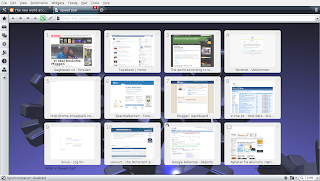
How to change the background of Speed Dial in Opera 9.50


Updated 2 September 2008:
To change the background of the Speed Dial tab in Opera 9.50, you need to do the following:
  1. Go to Tools --> Appearance --> Skin to find out which skin you are using. If it says Opera Standard, you are using the default skin, otherwise, you are using a downloaded skin. Note the name of the skin.
  2. As root, open the zip-file containing the Opera skin that you are using. The default skin can be found at /usr/share/opera/skin/standard_skin.zip, while downloaded skins can be found at /home/username/.opera/skin/*.zip. You can use the following command in a terminal:
    sudo gnome-open /usr/share/opera/skin/standard_skin.zip
  3. Open the folder /backgrounds in the zip-file by double-clicking it.
  4. Open a file browser (Nautilus) and locate a background image that you want to use, e.g., /usr/share/wallpapers/triplegears.jpg.
  5. Add the background image (triplegears.jpg) to the /backgrounds folder by pressing the Add Files... button and locating the image.
  6. Open skin.ini from the zip-file and scroll down, or use Ctrl+F, to go to the line containing
    [Speed Dial Widget Skin]
    Underneath this heading, add 
    Type = BoxTile
    Tile Center = backgrounds/triplegears.jpg
  7. Save skin.ini inside the zip-file, click "yes" to update the  archive, and restart the browser.

Note that your newly installed background image for the Speed Dial tab may be affected by the current color scheme. In my case, the background image became very bluish because the color scheme was set to system colors. To avoid this, go to Appearance (Shift+F12) and make sure Color Scheme is set to No color scheme.

Some screenshots:

1. Determine the skin you are currently using:

2. The zip-file containing the skin:

3. The /backgrounds folder in the zip-file (note Add Files button):

4. Locating a suitable background image using Nautilus:

5. Click Add Files in the /backgrounds folder (see 3. above) and  add the background image:

6. Edit the file skin.ini to use the background image by adding the two lines in blue:

7. Save skin.ini and click "Yes" to update archive:

Add more speed dials and remove search field in Opera 9.50

By default, Opera 9.50 comes with 9 speed dials when you open a new tab. However, you may have a screen size and resolution that would accomodate more speed dials. For example, to get 4 x 3 speed dials, do the following:

  1. Go to Help → About Opera and note the path of your main Opera directory (look for the opera6.ini file), usually /home/username/.opera/.
  2. Make sure Opera is not running, then open speeddial.ini from this directory and add the following three lines:
    [Size]
    Rows=4
    Columns=3
  3. Start Opera and note the change.
You can still open the 9 first speed dials using Ctrl+n, where n=1-9. To add shortcuts to the other speed dials, follow this guide.

To get some extra space, you can turn off the search field the top of the Speed Dial page. Enter opera:config#UserPrefs|SpeedDialSearchType in the address field, hit Enter, and replace the value with 0. Scroll down to the bottom and click Save.  The changes will take effect immediately without restart.

Thursday, June 26, 2008

Using Linux to scan and remove viruses from a Windows computer

A common problem with viruses is that they are often extremely difficult to remove. Most of the time, you easily understand that there is something strange about your Windows box (apart from the usual Windows behaviour, that is :D) , so you run a virus scan and indeed, confirm your worry that you have been infected. But what is the worth of your antivirus application if it is unable to remove the virus, not to mention detect it in the first place?! Often, you need to find a dedicated mini-application that removes a particular virus, but if you can't, you're screwed.

The following is a recipe that works:
1. Install Ubuntu 8.04 (Hardy Heron) Persistent on a USB stick (see this guide, and read my reasons why)
2.Install antivirus applications on the Ubuntu system on the USB stick.
  • Avast Antivirus is easy to install (.deb available) and is free but requires email registration for a key (no spam).
  • Clam Antivirus is free and also available from repositories (enable universe). If you prefer a graphical user interface (GUI), also install clamtk using Synaptic.
  • AVG Anti-Virus Free for Linux/Freebsd 7.5.50 is not their latest release but might do the job.
  • Trend Micro HouseCall is a free online scanning service. Linux distributions must support libc6.
3. Make sure the antivirus applications and virus definitions are all updated.
4. Boot up Ubuntu on the infected Windows computer using your USB stick. You may have to enter the BIOS setup to change the boot order to boot from USB before booting from the (Windows) hard drive.
5. Launch an antivirus application in Ubuntu and tell it to scan the directory /media, where the windows partitions shall have been automounted as /media/disk, /media/disk-1, etc. at boot time.

(Note: I have only tried Avast and Clam. I noted that Clam seemed to be unresponsive upon starting a scan, but after 30 seconds or so started scanning.)

When you have successfully cleaned your mom's/dad's/friend's computer, lend them your USB stick (with all the usual snacks like Compiz Fusion/the 3D cube, OpenOffice, Opera 9.5 with email set up, Amarok, VLC player etc.) and tell them that anything they can accomplish in Windows (well, perhaps with the exception of premium video editing suites such as Adobe Premiere Pro) they can do with free software in a virusfree Linux environment!

Why you should install Ubuntu 8.04 (Hardy Heron) Persistent on a USB stick

There are several reasons you should install Ubuntu on a USB flash drive. First of all, a USB memory stick is easier to bring around than a Live CD if you need to install Ubuntu on a computer. But more importantly, by installing the persistent version, not only can you use your USB as a Live CD, but in addition, you can save any changes to the system to disk! In effect, this means that you have your own portable system that you can bring anywhere. Forget the worry of bringing your valuable laptop on vacation. Instead, once you have booted your system onto somebody else's computer, you can install software, perform system upgrades, and do your work on your own customized system with your own software installed. Everything you do is saved onto your USB stick. And if you do need to access or save something on the underlying system, the computer hard drives will be automounted at startup.

Naturally, your system will be limited by the disk size of your USB. Most installations use about 700 MB (the size of a Live CD) for the Live portion of the system, leaving the rest of the disk as free space. With a dirt-cheap 4 or 8 GB USB stick, you have plenty of space to install software and files.

Running a system from a USB can also be convenient if you need dedicated servers to perform exactly what you want. Rather than going through a procedure of installing necessary software and making sure that everything works on the existing system, which likely is a Windows computer loaded with crap, you simply plug in your pre-prepared USB stick and boot from it. It is cheap and quick to buy 10 USB sticks, prepare the system and software on one of them, and then replicate the entire system onto the 9 others.

Another great usage is for removal of viruses on a Windows system. Viruses are often hard to get rid of, as they might get loaded during boot-up and refuse to be deleted by the Windows antivirus application. Booting Ubuntu from the USB and running a virus scanner such as Avast or Clam (Clam is also available from repositories) should enable you to remove the viruses. See my guide for further instructions.

So how do you make such a USB stick? I just followed this guide, which was a piece of cake. If you want the USB stick to also work as a normal flash drive when connected to a computer, you might want to add a third partition in addition to the two needed for the Ubuntu Persistent system. Format it as NTFS so it is readable on both Windows and Linux systems. You might need to have this partition as the first partition for Windows to discover it. I have not tried this myself, but believe it should work.

How to synchronise files with rsync

Everyone knows it is a good idea to backup your data. However, the good ol' copy'n'paste routine is time consuming, inefficient, and prone to errors. By using rsync, you can achieve efficient synchronisation of files as only the change in data will be transferred.

For example, you might want to synchronise your home directory, /home/username/, to your external hard drive, /media/externalhdd/homebackup/. A oneliner is all that is needed:
rsync -ra --progress --stats --log-file=rsynclog /home/username/ /media/externalhdd/homebackup
The options used are:
  • -r recursive (includes subfolders)
  • -a archive (preserves, ownership, timestamps, etc.)
  • --progress (shows progress of files being synchronised)
  • --stats (print some statistics after synchronisation)
  • --log-file=rsynclog (save useful information in file rsynclog in current directory)
For other options, do
rsync --help
You can also use rsync for synchronisation to remote servers. If so, you may do
rsync -ra --progress --size-only /home/username/ server.example.com:/home/username/homebackup/
Note that such a connection to a remote server is insecure! You should be using SSH. Google it to find out how. One possible starting point is here.

Finally, you may want to use a script that runs at scheduled times to automate your backup process. An example script can be downloaded here (see below). Modify the script by removing the user input and use cron to run it at regular times, e.g., every night. rsyncbackup.sh

How to compact a VirtualBox virtual disk image (VDI)

After having used VirtualBox for a while, the actual size of your virtual disk image (VDI) may have grown to become very close to the virtual size. That is, even if your guest machine system reports that it only uses a small amount of disk space, its VDI image filesize is considerably larger. In general, the following three steps will compact your VDI file:
  1. Defragment hard drive (in guest system)
  2. Write zeros to hard drive blocks of free space (in guest system)
  3. Compact the VDI virtual disk image (in host system)
After this process, your VDI file size should be approximately equal to what the guest system reports being in use.

Consider the following example: I run Ubuntu 8.04 as the host system and have Windows XP installed as a guest machine. The corresponding VDI file, winxp.vdi, has a virtual size of 20 GB and an actual size of ~18 GB. However, logging in to the virtual Windows XP system, it tells me that only 3 GB of disk space is in use, while 17 GB is free. How can I shrink, or compact, the VDI file to only use about 3 GB as needed?
  1. Windows XP (guest): Run Start -> Accessories -> System Tools -> Disk Defragmenter
  2. Windows XP (guest): Download and run nullfile-1.02.exe, or run
    sdelete -c

  3. Ubuntu 8.04 (host): Run
    VBoxManage modifyvdi winxp.vdi compact

Afterwards, the actual size of winxp.vdi is only ~3GB, that is, about 15 GB of free space has become available to Ubuntu.

Assigning keyboard shortcuts in Ubuntu

Changing keyboard shortcuts in Ubuntu is fairly easy. First, check a rather limited list of commands by opening System -> Preferences -> Keyboard Shortcuts. If the task you want to assign a keyboard shortcut to is listed, simply change or assign a desired shortcut to the task and you are done. However, if you are like me, it is likely that your desired task (application, script, etc.) is not listed. In this case, you can use the Gnome Configuration Editor.

Let us change the default behaviour of Ctrl+Alt+Delete to open up the System Monitor instead of displaying the logout screen:
  1. Open Keyboard Shortcuts, go to Desktop, and change Log out from Ctrl+Alt+Delete to something else, for example Ctrl+Alt+Home.
  2. Press Alt+F2 and run gconf-editor.
  3. Maneuver to apps -> metacity -> keybinding_commands.
  4. Doubleclick a command key, for example command_1, and enter the command gnome-system-monitor. The full path may be necessary for a script or or other command (e.g., /home/username/myscript.sh).
  5. Maneuver to apps -> metacity -> global_keybindings.
  6. Doubleclick the run key corresponding to the command key in step 4, i.e., run_command_1, and enter the desired keyboard shortcut, Delete.
If you are running Compiz Fusion as your window manager, it may be that you must use the CompizConfig Settings Manager (CCSM) to change the keyboard shortcut. This method is even simpler:
  1. Go to System -> Preferences -> Advanced Desktop Effects Settings and select the Commands tab under General Options.
  2. Select the Commands arrow button and enter gnome-system-monitor in a command line, for example command line 0.
  3. Select the Key bindings arrow button and click the button corresponding to the same run command, i.e., Run command 0. Enable it and enter the desired shortcut key combination.
After completing the procedure above, Ctrl+Alt+Delete will now open the System Monitor, while Ctrl+Alt+Home will show the logout screen.

Black or blue screen during video playback with Compiz Fusion 3D cube enabled

When running Compiz Fusion as the window manager in Ubuntu and having the 3D cube enabled, there is a known bug in the Ubuntu distros that can cause video playback to only display a black or blue screen (the sound is fine). Apparently, the bug has to do with a conflict relating to the video output driver xv. Compiz Fusion prevents the video application to use the driver. A workaround is to change the video output driver of your video application, for example vlc, to x11. A procedure that worked for me is outlined below and was posted in the Compiz Fusion forum by user kevinmedina, who got his inspiration from Gremlinzzz, who posted a solution here.

Procedure:
GStreamer
(The default video player in Ubuntu, totem-gstreamer, and any video player that is based on the gstreamer backend)
  • Open a terminal and type "gstreamer-properties". Press Enter.
  • Click the Video tab.
  • Under Default Video Plugin select "X Window System (No Xv)".
  • Click Test to verify that video playback is working (you should be able to see the standard TV testing colour stripes).
  • Click Close
VLC
(VLC is not installed by default; you need to search in the package manager, then install)
  • Start VLC and click on Settings, then Preferences.
  • Expand Video and then expand Output modules. You will notice several options for output device.
  • Select the item Output modules, and notice the checkbox at the bottom right that says Advanced options. Check the box, and now you have the option to select a different output device.
  • Pick X11 video output
  • Click on Save and you are set!
MPlayer
(Mplayer is not installed by default)
  • Start Mplayer
  • Right-click on the screen and select Preferences
  • Select the Video tab and under Available Drivers select "X11 (XImage/Shm)"
  • Click Save and restart the program for the setting to take effect.
  • Some users reported that MPlayer may not be able to show videos in full screen.
Xine
  • Start xine
  • Click File, then Configure and then Preferences
  • In experience_level select "Master Of The Known Universe" so that all available settings are visible.
  • Select the tab for video.
  • Under Driver select "xshm".
  • Restart xine.
  • The same process enables Totem that has the totem-xine backend configured.

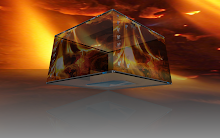
A screenshot of the 3D cube with working video ("One night in Paris") is shown below:

Free online chess at FICS

If you are tired of playing chess against your computer and/or do not have many friends who can or want to play chess, you may want to check out online chess. Perhaps the most popular free online chess provider is the Free Internet Chess Server (FICS). Logging on to one of their servers, you can play normal chess (lightning, blitz, standard) or variants such as suicide, atomic, or crazyhouse.

In order to play you should download a chess client. This is a graphical user interface (GUI) which typically provides all the necessary functionality and communicates with the chess server. Log in anonymously or with a username that you have registered at FICS, who also provide links to popular chess clients for Windows, Mac, or Unix/Linux. Good choices are Babaschess for Windows and eboard for Unix/Linux.

Being registered at FICS is highly recommended, as you get an official rating, comparable, but not identical, to those used by Kasparov (well, he is retired), Kramnik, Norwegian Magnus Carlsen (ranked fifth in the world) and others (check out the FIDE ratings). The server keeps track of your statistics such as number of games lost, drawn, or won, your rating in the various gameplays, as well as other details such as percentage of life online (!).

Steps to take:
1. Register a username ("handle").
2. Download a chess client, for example Babaschess or eboard.
3. Connect to FICS via the chess client.

Useful commands:
help, finger, history, seek, match

For more information, see Wikipedia.

How to install aMSN in Ubuntu

aMSN (Alvaro's Messenger) is a free open source, fully-featured MSN Messenger clone. Unfortunately, using the repositories to install it can sometimes fail, or at least, produce ugly fonts. The solution is to use an automatic install script, fixamsn.sh, which can be downloaded here. The script is regularly updated, as are the instructions and comments on the forum site. The script is supposed to work for 32-bit and 64-bit processors running Ubuntu Edgy, Feisty, or Gutsy. I have myself successfully installed several versions of aMSN on a 64-bit computer running Ubuntu 7.04 Feisty and 7.10 Gutsy using the script.
Instructions:
Simply download the script and maneuver to its location in a command line terminal. Execute
bash fixamsn.sh
You will be prompted for your root password. Don't be intimidated by the massive volume of text printed in the terminal. The script should take about five to ten minutes to complete. Enjoy!

fixamsn.sh Current as of 26 February 2008. Please refer to forum website for updated versions.

Wednesday, June 25, 2008

How to include Matlab source code in a LaTeX document

It would be nice to have a simple way of including Matlab source code in LaTeX documents. Fortunately, Florian Knorn has made an excellent solution with his LaTeX style-file (.sty), which can be downloaded (mcode.sty) at MATLAB Central.

You may want to open mcode.sty in a text editor for details on its usage. Basically, what you need to do, is as follows:
  1. Place mcode.sty in the same folder as your tex-file, or add it to your path (see the documentation of you TeX-installation).
  2. Add
    \usepackage[options]{mcode}
    to the preamble of your tex-file. Options include:
    - bw if you intend to print the document (highlighting done via text formatting (bold, italic) and shades of gray)
    - numbered if you want line numbers
    - framed if you want a frame around the source code blocks
    - final if you have "globally" set the draft option, the listings package will not output the code at all. To force it to do so anyway, load this package with the final option (passes the final option on to listings).
  3. Include Matlab source code in your tex-file by either including the entire *.m source file
    \lstinputlisting{/path_to_mfile/yourmfile.m}
    or placing snippets of source code in a lstlisting environment.
    \begin{lstlisting}
    % Example Matlab code for calculating hypotenuse
    % § $c = \sqrt{a^2+b^2}$ §
    a = 3;
    b = 4;
    c = sqrt(a^2+b^2);
    \end{lstlisting}
  4. Note: Inside code blocks you can 'escape' to LaTeX mode by using § YOUR LATEX CODE §, which is especially useful in comments.
In case the link to mcode.sty breaks in the future, you can download the style file below. Enjoy!
mcode.sty

About this blog

G'day,

and welcome to the new world according to locksley90! This is a blog with techno-related tips and tricks, and the occasional rave about... anything! The earliest material on this blog has been moved here from the old world according to locksley90. I enjoyed Opera's blogging environment but relocated to Blogger due to the Adsense capabilites. Please - click on the Google Ads on this site! It takes a lot of time and effort to write my posts. As a poor student, any money earned through your simply clicking on a few ads is much appreciated! Thank you.

locksley90